

Star Wars SPECIAL (Tutorial) ► https://youtu.be/HqpclmYestc
http://storyblocks.com/Cinecom – Learn how to use the ISO (gain), shutter speed and aperture to control the exposure of your DSLR camera and shoot in manual mode.
Remember picking up your first camera? I bet you where shooting with it in automatic mode. This means, you only need to pay attention to the framing of your shots and making sure you’ve hit that record button. So why bother putting that dial on full manual control then?
There are mainly three parameters that control the exposure (amount of captured light) ; the ISO (or gain), shutter speed and aperture. Each of these options also come with a side effect that has a visual influence on the captured video. That’s the first reason why it’s so important to know what they do and how it works. This is all shown in the video tutorial though.
A second reason you should take manual control over your DSLR camera is the pumping effect. Lets say you’re filming a road on a bright day and your camera has exposed on that. Suddenly a black car passes by, making your shot a bit darker in general. The automatic feature of your camera will let more light come in on that point. But in reality, it shouldn’t have.
ISO or Gain
A low ISO setting exposes your shots less, but will give a cleaner image. Higher ISO settings tend to cast digital noise (typically in the black area’s).
Shutter Speed
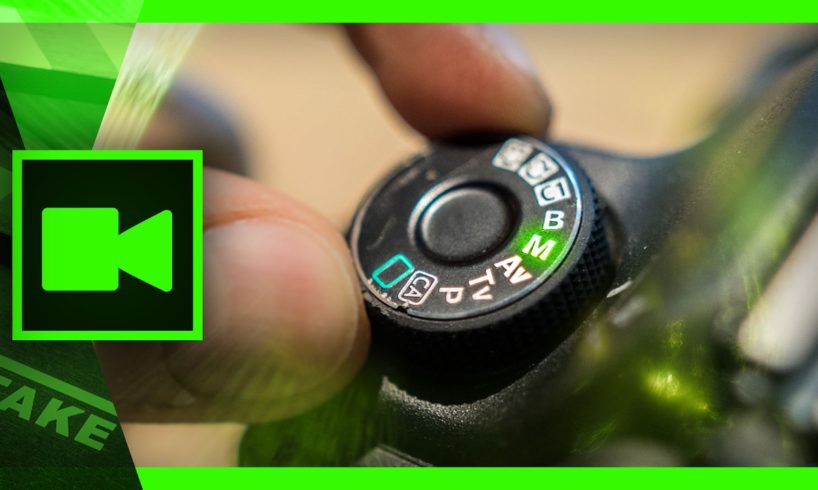
The shutter speed is the refresh rate of your camera. The slower the shutter speed, the more light is captured but also the higher the motion blur (like the image above). A too fat shutter speed results in having too sharp images. When shooting at 25 frames per second it’s advised to keep your shutter speed at 1/50th of a second to have natural motion blur.
Aperture
The Aperture is a control on your lens. It will fiscally let more or less light in. The side effect is the area that is sharp. We talk about a (shallow) depth of field. The more open, the more light comes in and the more out of focus your background is (considered more cinematic). The closer your aperture is, the less light is captured, but the more your background ill be sharp too.
Conclusion
Setting your exposure should be a constant value for each shot. Unless you’re walking from outside to inside, or any other extreme situation. Each shot or scene also has a different action, which is the reason we should take advantages of the side effects of the ISO, shutter speed and aperture.
✅ FROM THE VIDEO
Article ► https://www.cinecom.net/camera-tutorials/advanced-tips-filming-low-light
Focusing Tips ► https://www.cinecom.net/camera-tutorials/5-pro-tips-better-camera-focus/
Videoblocks ► http://storyblocks.com/Cinecom
✅ OUR EQUIPMENT
My Custom GH5 Camera Rig
► https://www.cinecom.net/gear/custom-panasonic-gh5-camera-rig/
Cheap Green Key Equipment
► https://www.cinecom.net/gear/chroma-key-essentials/
All the Film Gear we use
► https://www.cinecom.net/gear
✅ LETS CONNECT!
Instagram ► http://cinecom.info/Instagram
Discord ► https://discord.gg/Cinecom
Use code CINECOM at https://squarespace.com/Cinecom to get your 14 day FREE Trial
#cinecom
source


4:17 Jordy! What are you doing, behind Jordy!?
Helps me get a better understanding of what I call "The Unholy Trinity" of ISO, aperture, and shutter speed! Looking forward to watching more videos! Thanks so much.
I'm struggling with getting my aperture, iso and shutter speed right. so I was shooting a video in the woods (I do mountain biking and dirt jumping). I was shooting at 24FPS, shutter I had at about 100 (otherwise it looks too blurry as I'm biking around). I had my aperture at f22ish because I wanted everything in focus, because I was shooting the other day then when I got home and looked at the footage to edit it, I couldn't use it as I was too blurry going round the corners and jumps etc. then to get it exposed correctly I had to have my ISO (according to my histogram) at its max so I was left with very grainy footage. I shoot in a Canon 600D. I want to upgrade to the 80D but I need to work out how to manually use the 600D first. any help would be very much appreciated. if you go on my channel and see my latest upload you'll see what I mean, I tried to color grade to make my footage look better.
அருமையான பதிவு
good regards
As a beginner I have a question about manual settings for video ( have a sony rx100 mark 5 )… on the last trip I did some videos in auto mode and the result was a disaster.. the trees I was filming looked just way to crispy and sharp ( probably due to a very high shutter speed,, was a very bright day…. now after some research I set it up like this ( shutter speed priority mode,, so it is locked (depending on fps) but the aperture is changing automatically ,,, 24 fps, shutter speed 1/50 ,, aperture auto,, ISO auto… but even when it gets to aperture 11f (max) it is still overexposed,, in the case like the drone I have, I would regulate this with ND filters,,, what can I do in this case??? isn t it better to keep just a locked shutter speed so the camera can regulate automatically the aperture for getting the right amount of light??? cause the light conditions are changing constantly…just when increasing the shutter speed to 1/200 the exposure is ok,, but then i have broken the rule of thumb (shutter speed 2x the fps ).. What actually happens when I turn the ND filter on on the camera??? please explain a bit how to keep the values and what to do when light conditions change,, thanks a lot in advance and sorry if some of the questions are stupid but I am just a beginner in manual settings for video))))
3:50 spooky guy in the background….
Did anyone else notice the small version of him on the left hand corner?! ??
You are amazing! Thanks! 🙂
But Sometimes video over exposed while iso 100 aperture 2.0 and shutter speed 1/50 and 1080p 24 fps… What should I do to get perfect exposure.. plz ans my question
The course that you have, is it just for dslr filmmaking? How about mirrorless camera?
3:17 commercial????
nice video…..I like it
I can't thank you enough for this quick little video of explanation on shutter, iso vs aperture…. I was wanting the smooth cascade with waterfalls. I was running into the problem of getting waaaaaaaay too much light and the photos came out like junk. Now that you explained this I get some ROCKEN nice shots… Thank You, Thank You….. THANK YOU….
Set to A mode, then iso 800 , works most situation. Let the camera control the shutter speed. Modern dslr or mirrorless camera, has good enough high iso with less noise like A6500 or D3400 or 70D. Futhermore some camera comes with evf, life much easier. Sometimes i boost iso to 6400 on my 70D when requires and corrected noise with software such powerdirector . However, most critical in my opinion is the correct white balance.
how many highest ISO setting for good looking footage?
i was so confused with my a6500 until i found this video. thanks guys for this channel.
does anyone noticed we have a second Jody at the lower left corner at 3:52? lols..
what if we wanted to make slowmo video? should we put higher shutter speed for better slowmo?
Dear jordy Kindly Do video on ND Filters Also
videos are getting better!
filmaking!!!!! WTF
Ik zou graag een nieuwe camera willen kopen maar ik zit te twijfelen tussen de Lumixg7 of een gh4. wat Raad je aan? of ligt het er aan wat ik er mee ga doen?
Thank you!!#! Make a video for better cinematography!!!
Super helpful!!!
Can you if you have not done so already, do a video on external video mics and using with DSLR's and video cameras
when i get the new Panasonic GH5 i can try it out. my DSLR is broken so i only have a handy cam 🙁
you guys produce great videos. Keep it up..
3 very good tips 🙂
100000 comming soon